If your SmartBench is having squareness issues then you have to simply adjust your skids on the Lower X Beam (Check your lower beam serial number is on or after XL0240)
< Previous | List | Next >
Diagnosing non-squareness
If you have programmed your job file to cut a square but you noticed it had turned out to be a parallelogram then this indicates the squareness of your Upper X Beam may need adjusting.
A: True cut profile
B: Actual profile to cut
C: Offset cut
D: Job file datum

Altering the upper beam angle in the XY plane
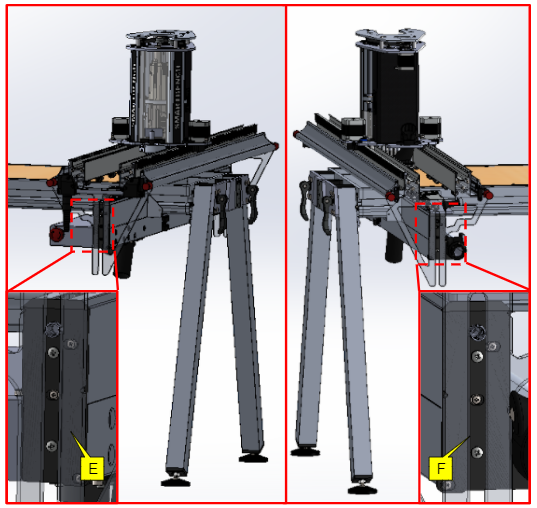
Skids are located on the Lower X Beams as shown in the image
E: Left side skid
F: Right side skid

To adjust the skids remove Upper X Beam first then by unscrewing the skid bolts you can change the position of the skids.

You can loosen the handle bars by rotating them anti-clockwise and leaving them in an open position.
G: Left side handle
H: Right side handle


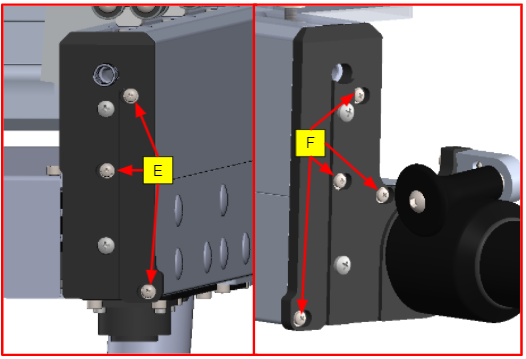
Use a PZ1 screwdriver to slacken the screws identified in the image below. Note the handle bars are intentionally removed from the image to show which screws to slacken.
E: Left side skid
F: Right side skid
|

|
Only adjust one skid at a time.
Do not remove all the screws completely.
|

Once the bolts are slackened you will be able to slide the position of the skid a couple of millimeters in either of the Y axis. This adjustment is used to compensate for the non-squareness. If you run out of adjustment in one skid, you can adjust the opposing skid in the opposite direction to achieve more adjustment range.

After adjusting the skid position, retighten the bolts. Be careful if you are using power tools to not overtighten and shear any of the bolts
Re-assemble Upper X Beam (click here to learn how) and re-run your job file program to check whether you still have squareness issues.
A: True cut profile
B: Actual profile to cut

|

|
If you still have issues with the squareness then submit a support ticket by clicking here.
|
< Previous | List | Next >