This article will explain what manual squaring is, and how to manually square and Home SmartBench.
< Previous | List | Next >
What is manual squaring?
Manual squaring is the process through which the operator aligns the X Beam with the home end of the Y Bench.
The operator will physically push the X Beam against the Legs of the Y Bench, whilst SmartBench is switched off.
When SmartBench is switched back on, the motors will lock the manual alignment into place.
|

|
Manual squaring exerts less stress on the motors and results in better repeatability than auto-squaring.
|
Note that the home end can be identified by the home label on the end of the Y Bench:
A: X Beam
B: Stepper motors
C: Legs

How to manually square SmartBench
Power off the SmartBench by shutting down the Console, and then pressing the power button.
Click here to learn more about powering down SmartBench.


If the extraction hose is connected to the Z Head, remove it now by rotating it anticlockwise and returning it to the extraction hose housing:


Now that SmartBench is powered off, the entire X Beam assembly can be moved along the Y axis by pulling it from the middle of the Lower X Beam:
D: Lower X Beam


Manually pull the X Beam up against the Y Bench Legs at the home end.
E: Y Bench
F: X Beam
G: Legs

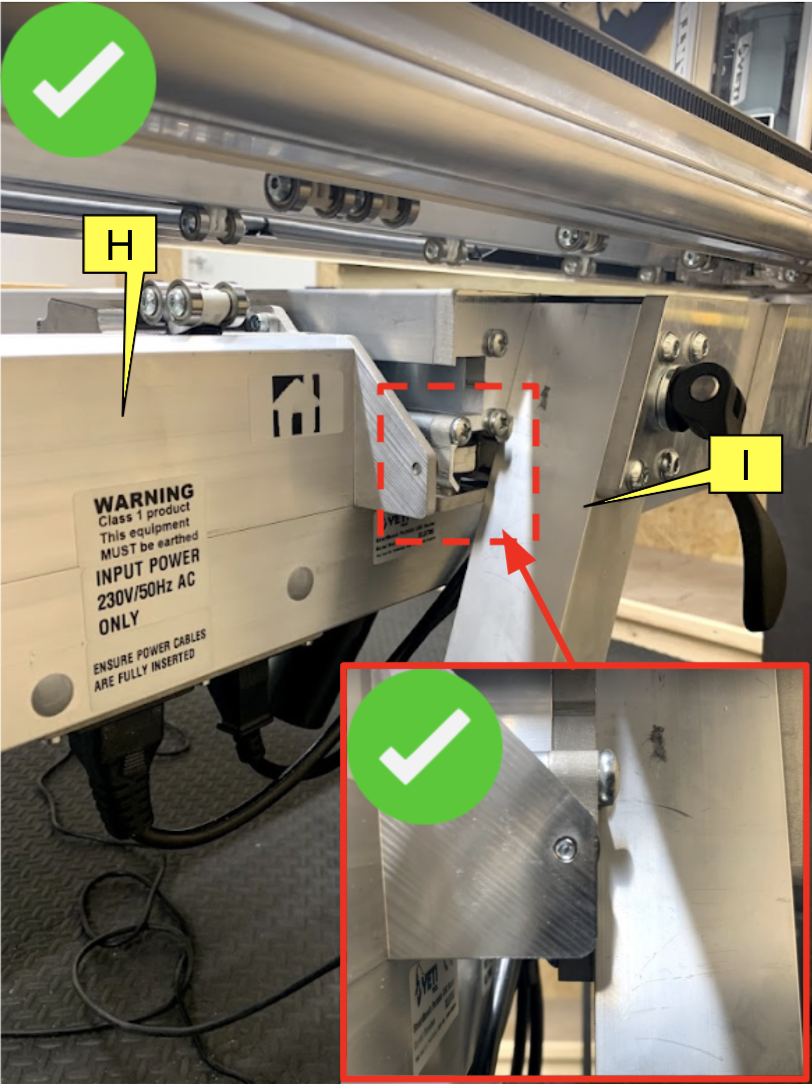
Make sure that there is no gap between the Legs and the X Beam.
H: X Beam
I: Legs

|

|
Leaving a gap between the Legs and the X Beam will result in incorrect homing, and SmartBench will not run squarely during operation.
|
J: X Beam
K: Legs

When you are sure that the X Beam is completely in contact with the Legs of the Y Bench, you can turn on SmartBench.
Turn on SmartBench by twisting the power button clockwise, and releasing it.

The powered motors will lock the X Beam into position.
The Z Head will light up yellow, and the Console will load up the safety screen.

Ensure that you pay close attention to this screen.
When you are ready to proceed, press the button at the bottom of the screen to confirm that you have read and understood the instruction manual.

The following screen will ask you if SmartBench needs to auto-square the XY.
Press the “No, I manually squared already” button.

Ensure SmartBench is clear.
|

|
Look for any tools left on the bench, which could disrupt the homing process.
|
A clear SmartBench should look like this:

Press the button in the middle of the screen to home.

This will start the homing process.

An orange light indicates that SmartBench is finding the home position.
The Z Head will move towards the home end of the Upper X Beam.

When SmartBench has finished homing, SmartBench will have a green light, and the Console will show the main menu screen.


SmartBench has been manually squared and homed, and now you can set up for your job.
< Previous | List | Next >