This article will detail on how to prepare your Lower X Beam before undertaking any servicing or wheel replacement.
< Previous | List | Next >
Tools required
You will need the following tools for repair/ maintenance:
A: 4mm torx driver
B: 10mm spanner

Preparing your beam
You will need to access your Lower X Beam before you can make changes to the Y axis wheel setting. Click here to learn more.

Set motor height
The motor is set to allow the pinion to mesh with the rack. However, when undertaking maintenance, you will need to lower the pinions slightly. This will prevent damage to the rack and pinion.
As an indication, if the motor is raised (as shown in the picture below) this means the pinions are meshing into the racks.

To lower the motor pinion, loosen the hex bolt by using a 10mm spanner on both sides of the beam.

and loosen off the 4mm hex socket at the top of the motor on both sides of the beam.

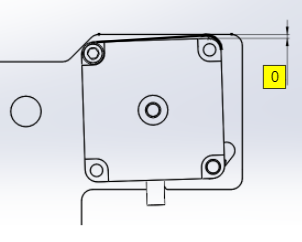
Level the raised edge parallel to the mounting plate, so the distance between the two becomes zero. This will move the pinions down meaning less resistance will be required to push or pull on the Lower X Beam.
D: Mounting plate


Check wheel plates
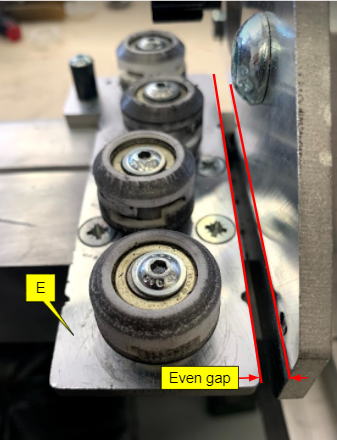
Check the lower wheel plates are parallel to the motor mounting plate. If the plate is not set at an even distance or it’s angled then this will put pressure on the wheels as a result they wear out quickly.
E: Wheel plate


We recommend using a set square to check the wheel plate is square to the Lower X Beam extrusion.
If you find that the plate is not parallel or is loose, then unscrew the 4 CSK bolts and set the plate to match the squareness to achieve parallel gap. Re-tighten the CSK bolts to secure the plate. These bolts have blue loctite applied so may be more difficult to remove than expected.
F: Set square
G: CSK bolts

Replacing wheels on Lower beam
Now go to the next article by clicking here to replace your old wheels with the new ones.
< Previous | List | Next >